When we build models in ReliaSim, we start and end with infinite capacity buffers. The starting buffer is infinite capacity and infinitely full, while the ending buffer is infinite capacity and starts empty. This is basically a simple assumption for the sake of the model. We assume we'll have material to process, and it will have somewhere to go. When you first start ReliaSim, or open a new file, you'll be greeted by a model with these two buffers sandwiching a constraint. This is a great starting place to build our model from.
Let's look at the jarring process for peanut butter, and what it might look like to model this.
We start with an infinite supply buffer, this represents our peanut butter entering the model we're studying. The peanut butter then is filled into jars, because we're going from a volume of peanut butter to a single jar containing that volume, this is a perfect place to use a converter node. Those jars are then sealed with their caps, and labels are applied. Since both of these are processes that start and end with the same unit, "jars," we can easily model these processes with simple constraints. Next the jars are packed into shrink-wrapped cases for shipping, and finally those cases are stacked onto pallets to be shipped out. These last two processes also change the form of our material, so let's again use converters to nicely represent this process. This gives us the following framework for our model:
- A starting buffer for bulk supply of peanut butter
- A converter for the filling station
- A constraint for the capping process
- A constraint for the labelling process
- A converter for the case packer
- A converter for the palletizer
- A final buffer for finished goods
ReliaSim's click connect system makes it easy to represent this process. Let's start by building our node structure. From a new file, it should look a little bit like this.
In the animation above, the process was as simple as left-clicking, dragging to where we want our next node, and then selecting the node type. The we just left click and drag to connect our final new node to the last buffer. Next we'll add details to each node to better reflect our model. For our first unit. we just want to note that we're supplying a bulk amount of peanut butter. For ease of conversion in the next step let's set this output unit to oz.
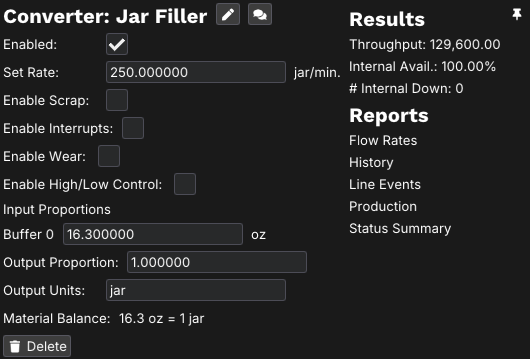
Next let's look at our jar filler. from the video, we know it can fill up to 250 jars per minute. doing a quick search, the most common size for a jar of peanut butter is 16.3 oz. When we left click on converter 0 in the example above, we can fill in the information as shown to reflect our example. Clicking the pencil icon besides the converter name allows us to rename it to "Jar Filler"
Next is our capping and labelling process. For both of these nodes, let's assume they are designed to keep up with the jar filler, so we'll set each of them to a rate of 250 jars per minute, and rename them to keep track of the process they represent. Both of these nodes should look like the following, apart from the name.

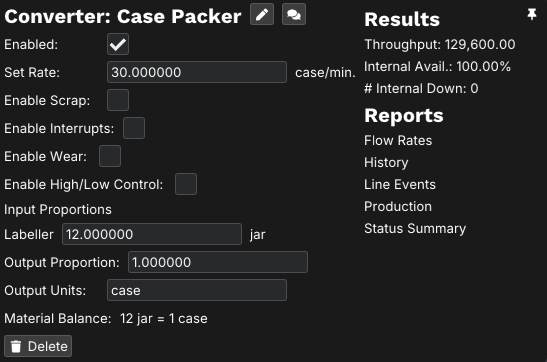
Once the jars are complete, we want to pack them into cases. for our example let's assume they're being packed into cases of 12 jars, and that the case packer can create about 30 cases per minute. Withe these parameters, this node would look like the following.
Finally, these cases will be packed onto pallets to be shipped. For our palletizer step, let's assume we can fit 60 cases on a pallet, and that our material can be palletized at up to one pallet per minute. This leaves our final node before our ending buffer looking like this.

Now we've got our model laid out, and the structure reflect the process we're looking at. The final structure should look like the following image.

In the next pages, we'll introduce interrupts and perform experiments to see the practical data we can learn from our model. The next step to building a practical model is to introduce interrupts to your model.